

Level of Difficulty: Easy
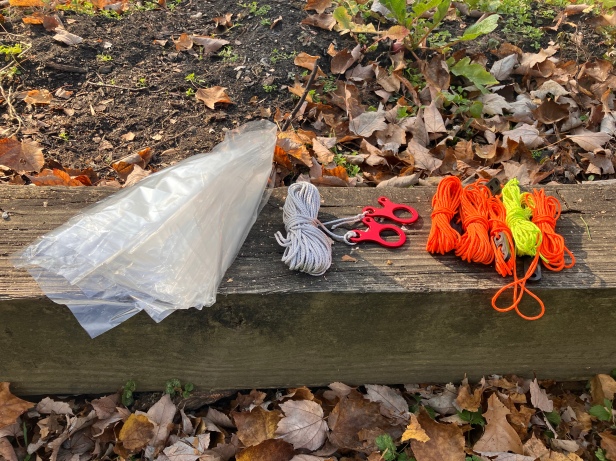
If you’re familiar at all with ultralight backpacking, you know that ultralight gear is often not cheap. While you may not want to cheap out on your “big three” (shelter, sleep system, and pack), there are some areas where you can make your own (MYO) gear to complement your big three and keep your base weight down for much cheaper than you could buy. I’m not talking sewing or anything here, I’m going to keep it simple and show some areas where everyone – no matter your skillset – can make your own ultralight gear. Let’s take a look at a few areas where making your own ultralight gear can be easy and affordable:
How to make your own ultralight ground cloth / groundsheet
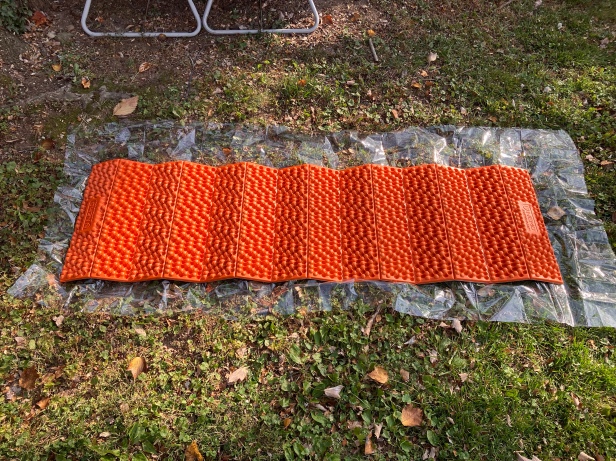
Ground cloths / groundsheets are important for keeping moisture off of your sleep system and/or shelter, and also for extending the life of your gear. A SUPER easy and cheap way to make an ultralight groundsheet is with a run of the mill window insulation shrink kit. These plastic sheets are made out of polycryo, the same material you will see advertised at twice or thrice the price on ultralight gear websites as groundsheets. This stuff is super durable and lightweight. And even if you do put some wear on it, repairing holes with duct tape will keep your ultralight groundsheet going strong for many more trips.
What you need
- Frost King Shrink Window Kit (84″ x 110″)
- Scissors
- Measuring tape
- Permanent marker
Instructions
- Open up your Frost King Shrink Window Kit (84″ x 110″), unfold the polycryo sheeting, and spread it out on the floor
- Measure the dimensions you need for your groundsheet, and mark a spot to cut each side with a permanent marker. In many cases, you can actually get two groundsheets out of these kits – either to replace one that has lasted years or to split with a buddy,
- If you’re using a tent, it never hurts to look up what the brand name footprint dimensions are and cut your polycryo to the same dimensions. For example, for Chris’ Eureka Solitaire AL 1P Tent Eureka also makes a matching footprint. Instead of buying an expensive brand name footprint, cut the polycryo to the same dimensions – in this case roughly 86″ x 32″. The Eureka footprint actually tapers at the bottom down to 26″, and there’s no reason you couldn’t cut the same taper, but folding the excess under your tent will do also. By comparison, the Eureka! footprint weighs 5 oz whereas the homemade ploycryo groundsheet will weigh ~1.2 oz.
- If you’re sleeping under a tarp, a common groundsheet size is 84″ X 36″ (7 feet x 3 feet). You can also customize this based on any bug net or bivy you’re using.
- Cut a rectangle in the shape you measured. Cut another one if you’re making two.
And voila! You’ve made your own ultralight ground cloth / groundsheet. Fold / roll it up and you’re ready to go backpacking with it.
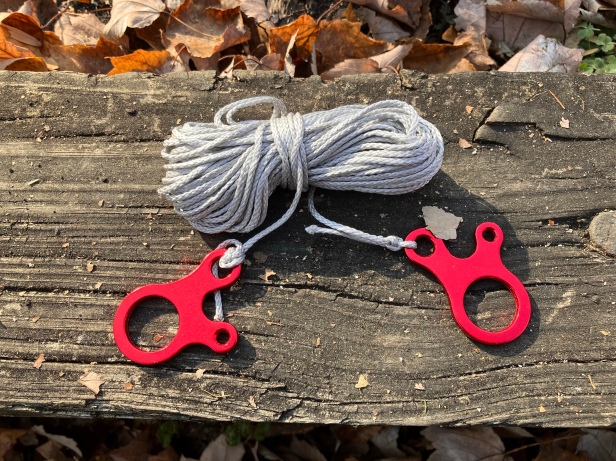
How to make your own ultralight tarp ridgeline
If you’re a tarp fanboy like me (see my post on my Borah Gear Silpoly Solo Tarp), then you know that for some setups a continuous ridgeline is the lynchpin of the whole setup. You can buy pre-made ridgelines at various ultralight outfitters, or you can make you own. Even if you’re not a tarp person, throwing a ridgeline in your pack can come in handy for drying wet clothes or gear. Please note that these instructions are only for a continuous ridgeline, and there are a number of ways one could modify this for other setup styles.
What you need
- Cordage – I recommend either Lash-It! or Zing-It! for maximizing your strength to weight ratio, but there are cheaper options available as well
- Scissors or knife
- Measuring tape
- Lighter
- Tarp hardware (optional) – I recommend these onewind aluminum tensioners
- Knot tying guide (optional) – If you don’t have your knots memorized and need a reference in the field, I recommend this Pro-Knot outdoor knots pocket guide
Instructions
- With your measuring tape, measure 40 feet of your cordage and cut it with a knife or scissors.
- I recommend 40 feet because though you may not always need the length, it gives you plenty of flexibility in the event you do. If you’re relying on trees, the two best trees may end up being farther apart than you hoped.
- Melt the ends of your cordage with a lighter so they don’t fray in use
- (Optional) Tie any tarp hardware of your choice onto the ridgeline as needed. If you’re going knots only, you can skip this step
- Coil up your ridgeline in an organized fashion and throw it in with your gear
You’ve just made your own ridgeline that will support your tarp shelter system for future outings!
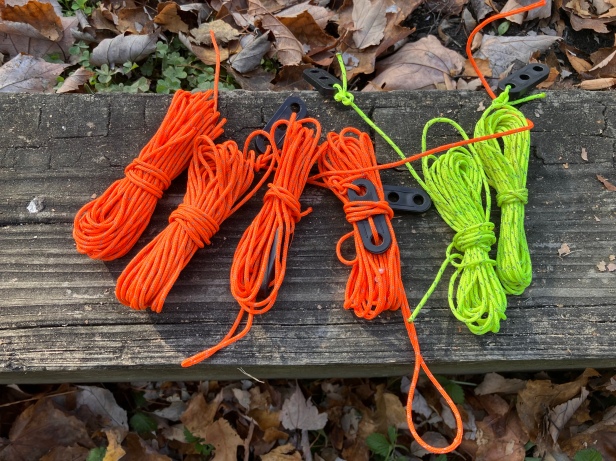
How to make your own ultralight guylines
Guylines are important for both tarp shelters and tents. For tarp shelters, they provide structure and keep the tarp taut to prevent water from pooling. For tents, they keep the rain fly taut and keep you as dry as possible during rain. If you’re working on a tarp setup, you likely won’t already have guylines. You can buy ultralight guyline kits or you can save some coin and make your own. Most tents come with guylines, but they may not be made of the lightest cordage and you might seek to replace them with something lighter. Either way, making your own guylines is easy.
What you need
- Cordage – You can use either Lash-It! or Zing-It! (which you may have excess of from making your own ridgeline above), or you can go with something cheaper and perhaps reflective like this ThreeBulls 1.8mm Fluorescent Reflective Guyline (I would not cheap out on the ridgeline but you could be ok with the guylines)
- Scissors or knife
- Measuring tape
- Lighter
- Tensioners (optional) – You can get by tensioning your guylines with just knots, but you could also add in your own tensioner hardware such as these plastic cord tensioners which are both lightweight and affordable. I use these plastic tensioners on all my tarp guylines.
- Stakes (optional) – You may already have stakes, but if you don’t or you want stakes lighter than what came with your tent then I find these Hikemax 7075 aluminum tent stakes perform great and keep the weight down. They also come in a 20 pack.
Instructions
- With your measuring tape, measure the lengths of guyline you need and cut them with a knife or scissors.
- If you’re doing only four guylines, I’d do two 20 feet long and two 30 feet long. This might seem excessive but I prefer flexibility over shaving an ounce or two. If you’re doing six guylines, I’d two four 20 feet long and two 30 feet long. These lengths will provide you all the flexibility you need, and in the event you need to cut some extra snippets of cordage for other things (Prusik knots, tie-outs, etc.) you have plenty to spare and cut from.
- Melt the ends of your cordage with a lighter so they don’t fray in use
- (Optional) Tie any tensioners of your choice onto the guylines as needed. If you’re going knots only, you can skip this step
- Coil up your guylines in an organized fashion and throw them in with your gear
Now you have ultralight guylines to complement your homemade tarp ridgeline, or to replace your chonky tent guylines!
Conclusion
These are just a few affordable ways to enhance your backpacking gear with some homemade ultralight items. Backpacking gear is expensive enough, so make it easy on your wallet and get to making your own!
What are some other ways you’ve made your own gear easy and affordable? I’d love to hear your other ideas in the comments below. Thanks for reading!
